
Aurora Photography: Photograph the Northern Lights on your iPhone with NightCap
The aurora is an amazing sight, and if you’re lucky enough to see the Lights you’ll want a photo or video to remember the occasion. With NightCap it’s easy! Learn how to take great photos and stunning time lapse video!
There’s just one important rule:
Use a tripod, or find some way to keep your device perfectly still.
Photographing the night sky means keeping the lens open long enough for the camera to absorb enough light, so it’s important to keep your iPhone or iPad still to prevent blurring.
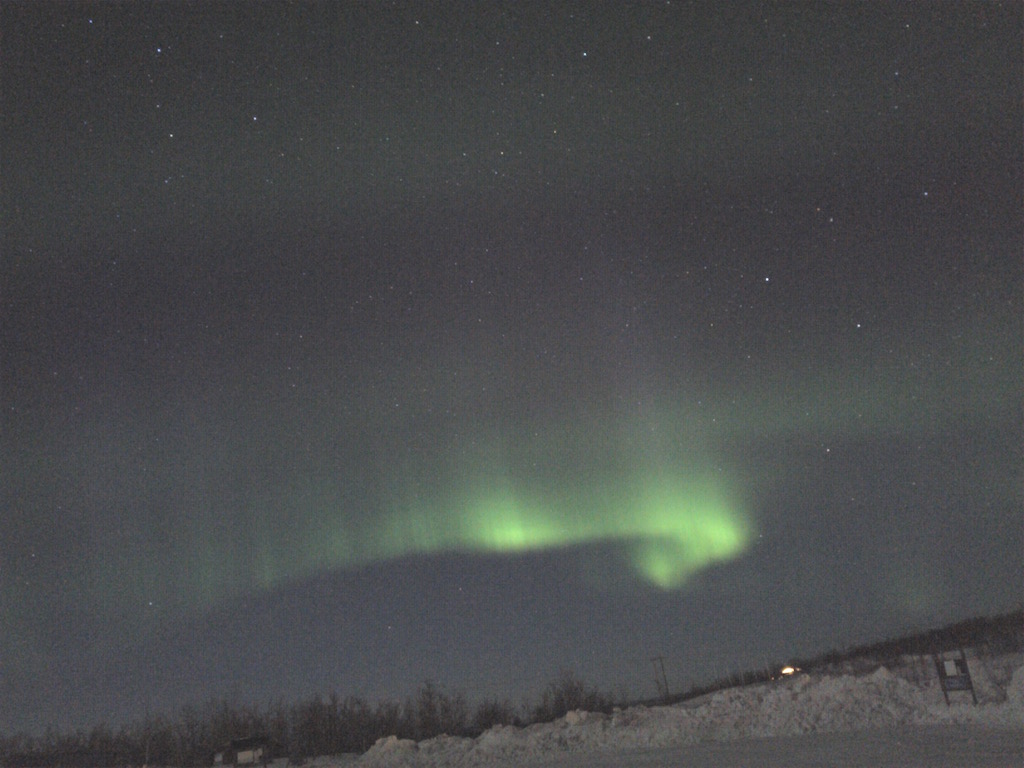
Taking photos
The easiest way to capture the Aurora well is to use NightCap’s Stars Mode. First, open the camera options by tapping the star icon:
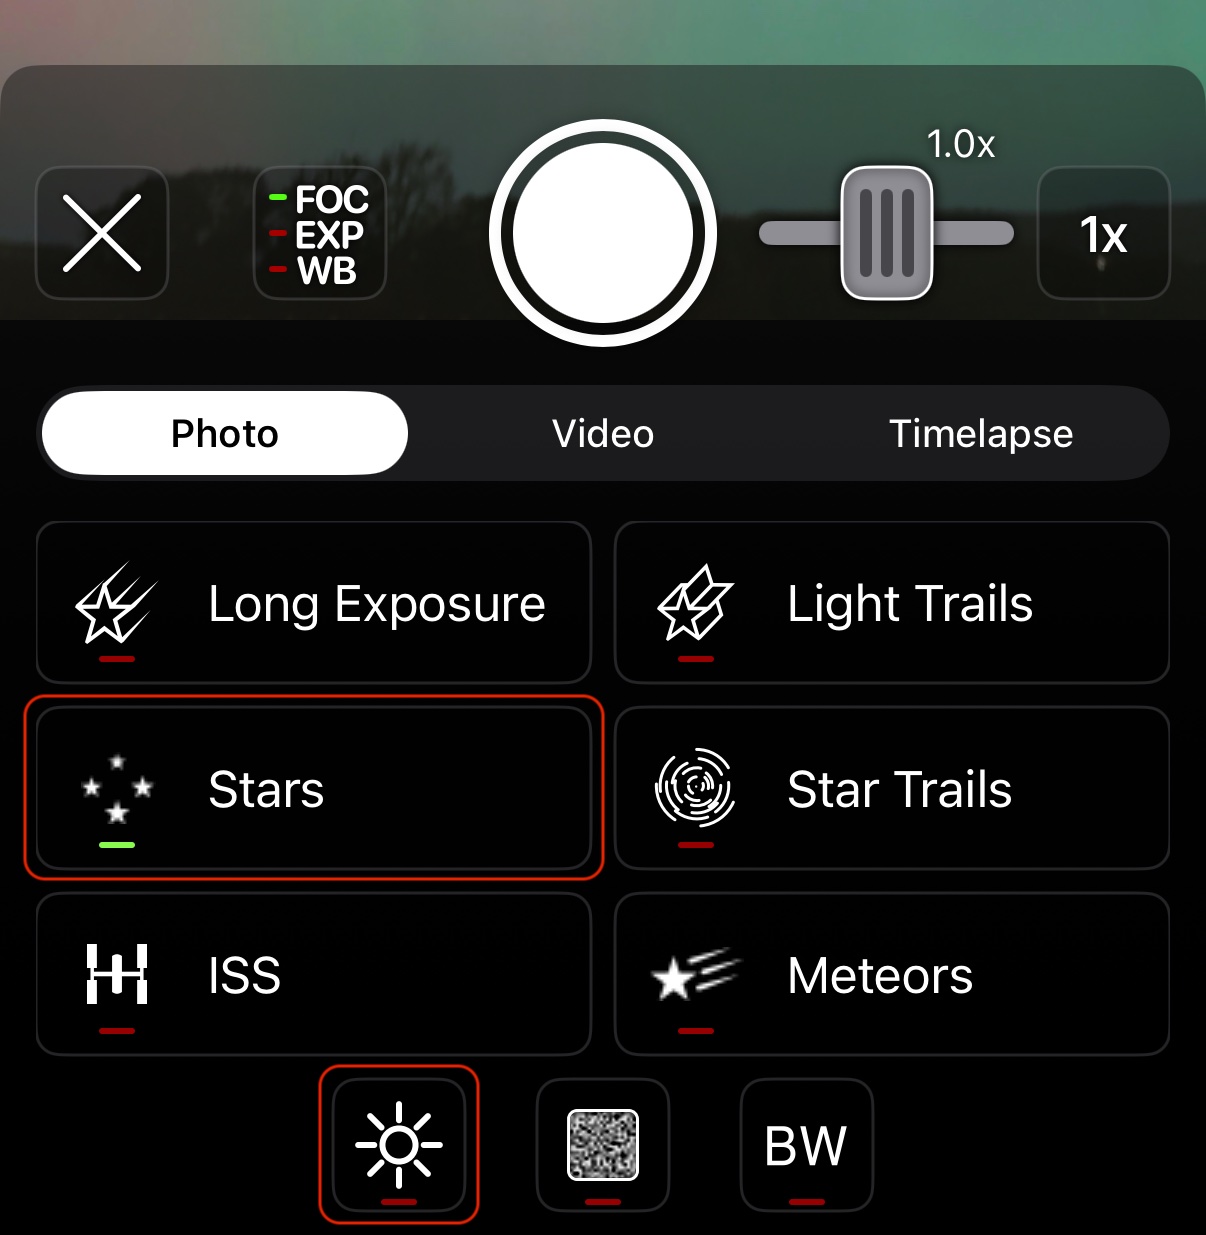
Turn on Stars Mode (a green light means it’s turned on). You’re now ready to take a photo – just tap the shutter and wait about 15 seconds.
If the lights are faint, try turning on Light Boost too, it can really help bring out them out. The “sun icon” button turns Light Boost on. You can adjust the Light Boost strength in the settings screen.
That’s it - tap the shutter button and wait for about 15 seconds.
Time lapse
The Northern (or Southern) Lights can look stunning in motion, but because they can move slowly and are very faint at times they’re difficult to capture well in a standard video. Time Lapse solves both of these problems, by producing a video that’s much faster than real life, and also allowing the camera to use long exposures to make the picture brighter.
Recording Time Lapse with NightCap is very easy, you just need a little patience. Here’s how.
First, open the camera options (by tapping the star button) to set the time lapse up.
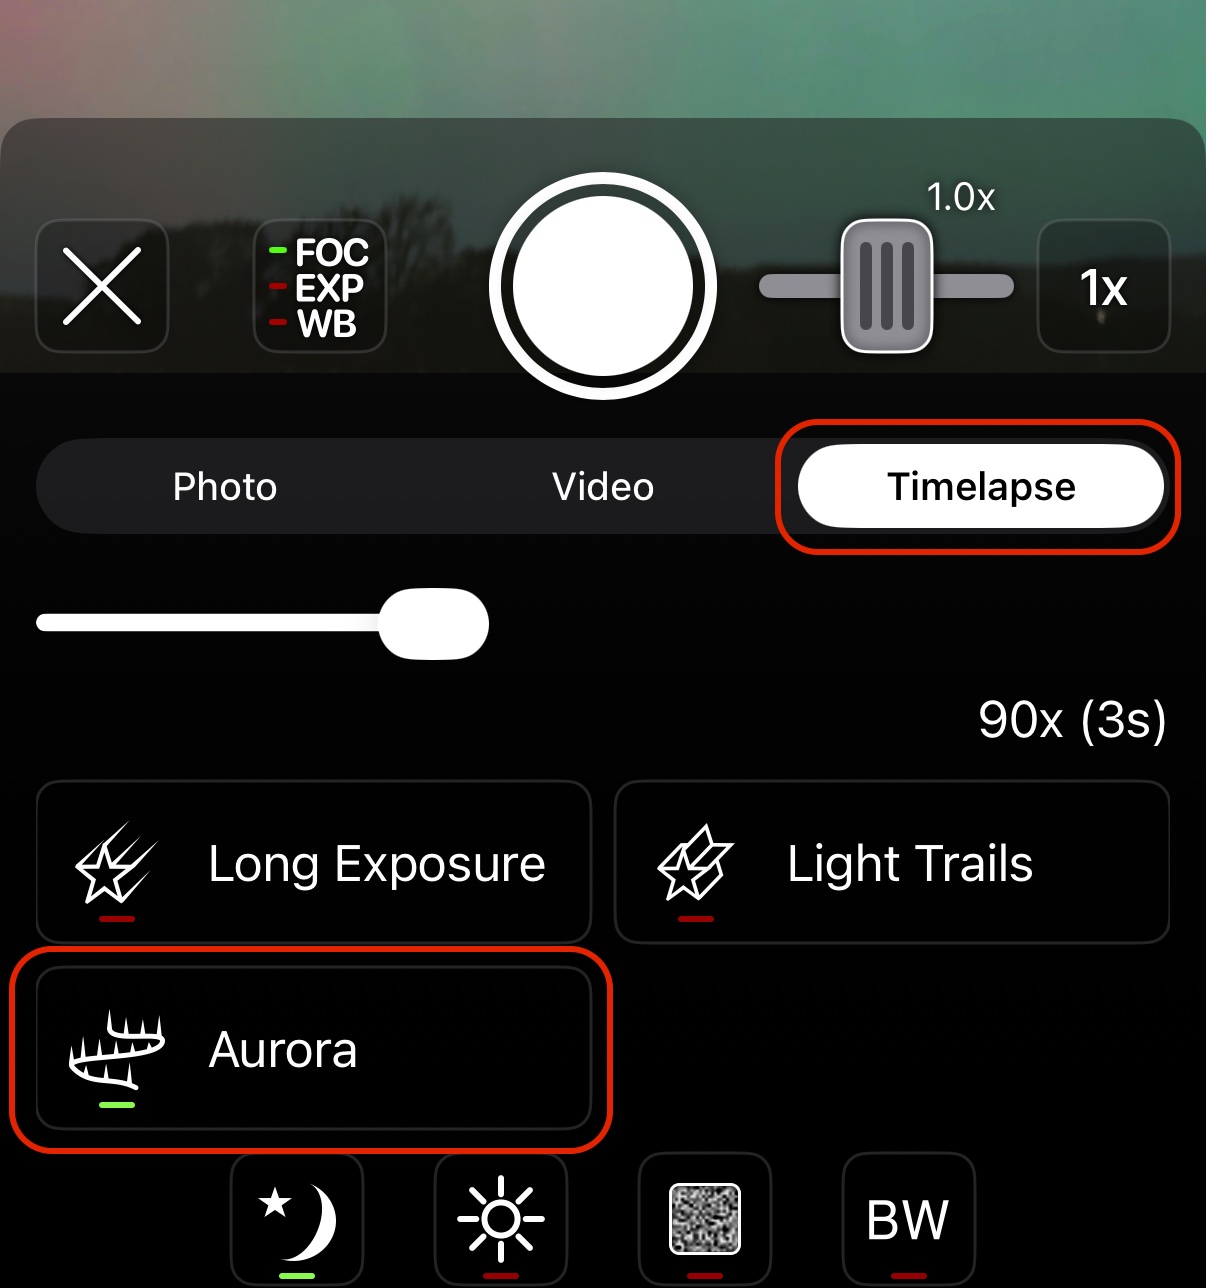
There are just 2 settings you need to set here:
Timelapse. This switches from Photo to Timelapse mode.
Turn on Aurora mode. A green light means it’s on. This will automatically set appropriate settings for the timelapse speed, manual settings for the camera, and also Night Mode (this gives much better results in low light). Once Aurora mode is on, you’re ready to go.
You can also change the quality if you wish. 4K is best quality but uses more storage.
Finally, if the lights are faint, turn on Light Boost (the sun icon). This boosts image brightness. You can adjust the strength of the light booster in the settings.
Now you’re all set. Just tap the shutter button to start recording, and again to finish.
Tips
Please note that time lapse video records much more slowly than normal, so it’s important to leave the camera running a while. At 90x, it takes 90 minutes of recording to produce 1 minute of video. If you plan to record for a long time, it’s best to connect your device to a power source such as an external battery.
You can use a remote shutter control. The volume buttons trigger the shutter, with nothing to turn on first. You can also use any headphones with a volume control (including the ones that came with your iPhone) or any bluetooth shutter release that’s compatible with iPhone. AirPods work too, once you’ve enabled that in your AirPods settings.
Batteries drain much faster in very cold conditions and iPhones can turn themselves off for protection if they get too cold. So if it’s extremely cold, try to wrap your device up to protect it from the cold. It’s best to set everything up first so you don’t need to touch the screen then use a remote shutter control.
Night Mode is only available for video and time lapse mode.
Please note that results will depend on many factors, including which iPhone or iPad model you use, sky / weather conditions, and how bright the lights are.
Not got NightCap Camera yet?
